Image Workbench
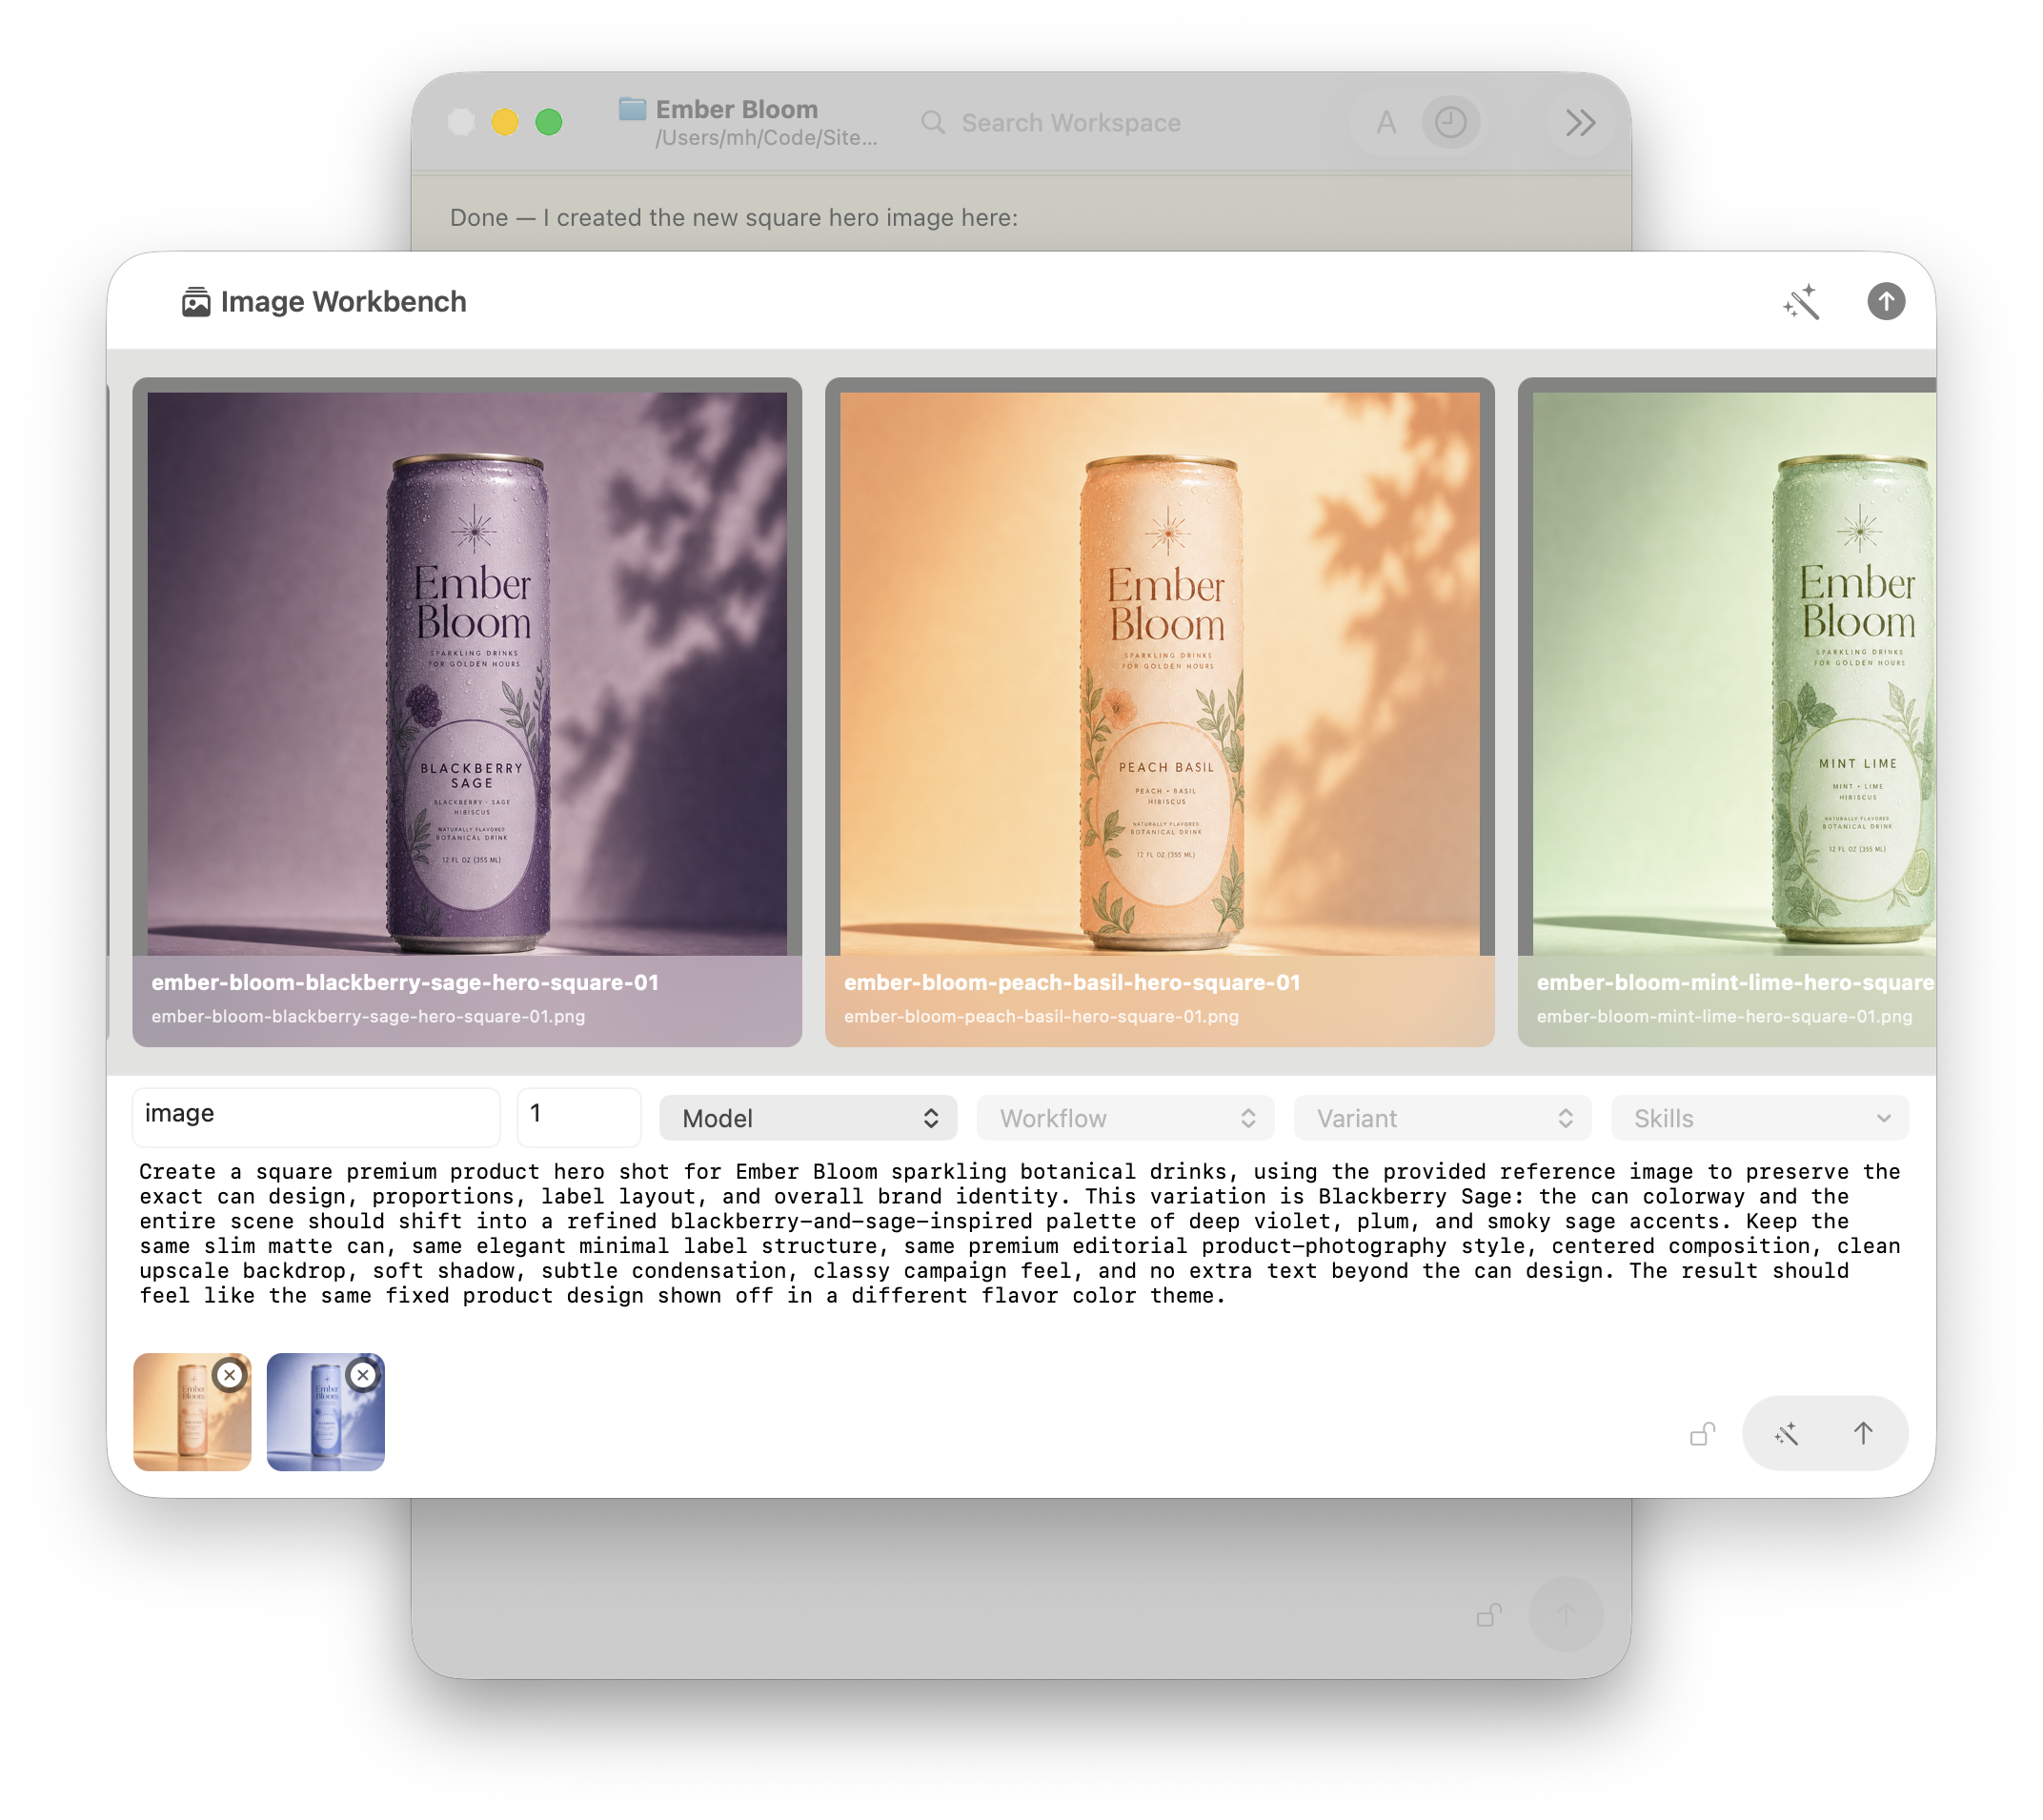
The Image Workbench is Campfire's focused surface for visual generation work. It keeps the prompt, reference images, generated results, and follow-up edits together so an image task can stay connected to the workspace instead of becoming a separate tool chain.
Use the workbench when you want to explore an image idea, compare generated options, refine a selected result, or edit part of an existing image.
For quick one-off generations, the chat-based /image command or just asking casually in the Chat is usually enough. For iterative visual work, the workbench gives the task more room.
Prompt Writing and Refinement
It is usually best to start with a plain description of the image you want. By clicking the "Refine Prompt" magic wand button, Campfire can help turn a simple explanation into a more detailed image prompt, including subject, composition, style, lighting, mood, and constraints that make the result more consistent.
Campfire will ask CodeBot to improve the prompt for you, usually resulting in a more detailed and more explicit description of the image. Feel free to iterate on this as often as you like: make changes to the refined prompt to remove aspects that you don't like or clarify missing points, then hit Refine again if needed.
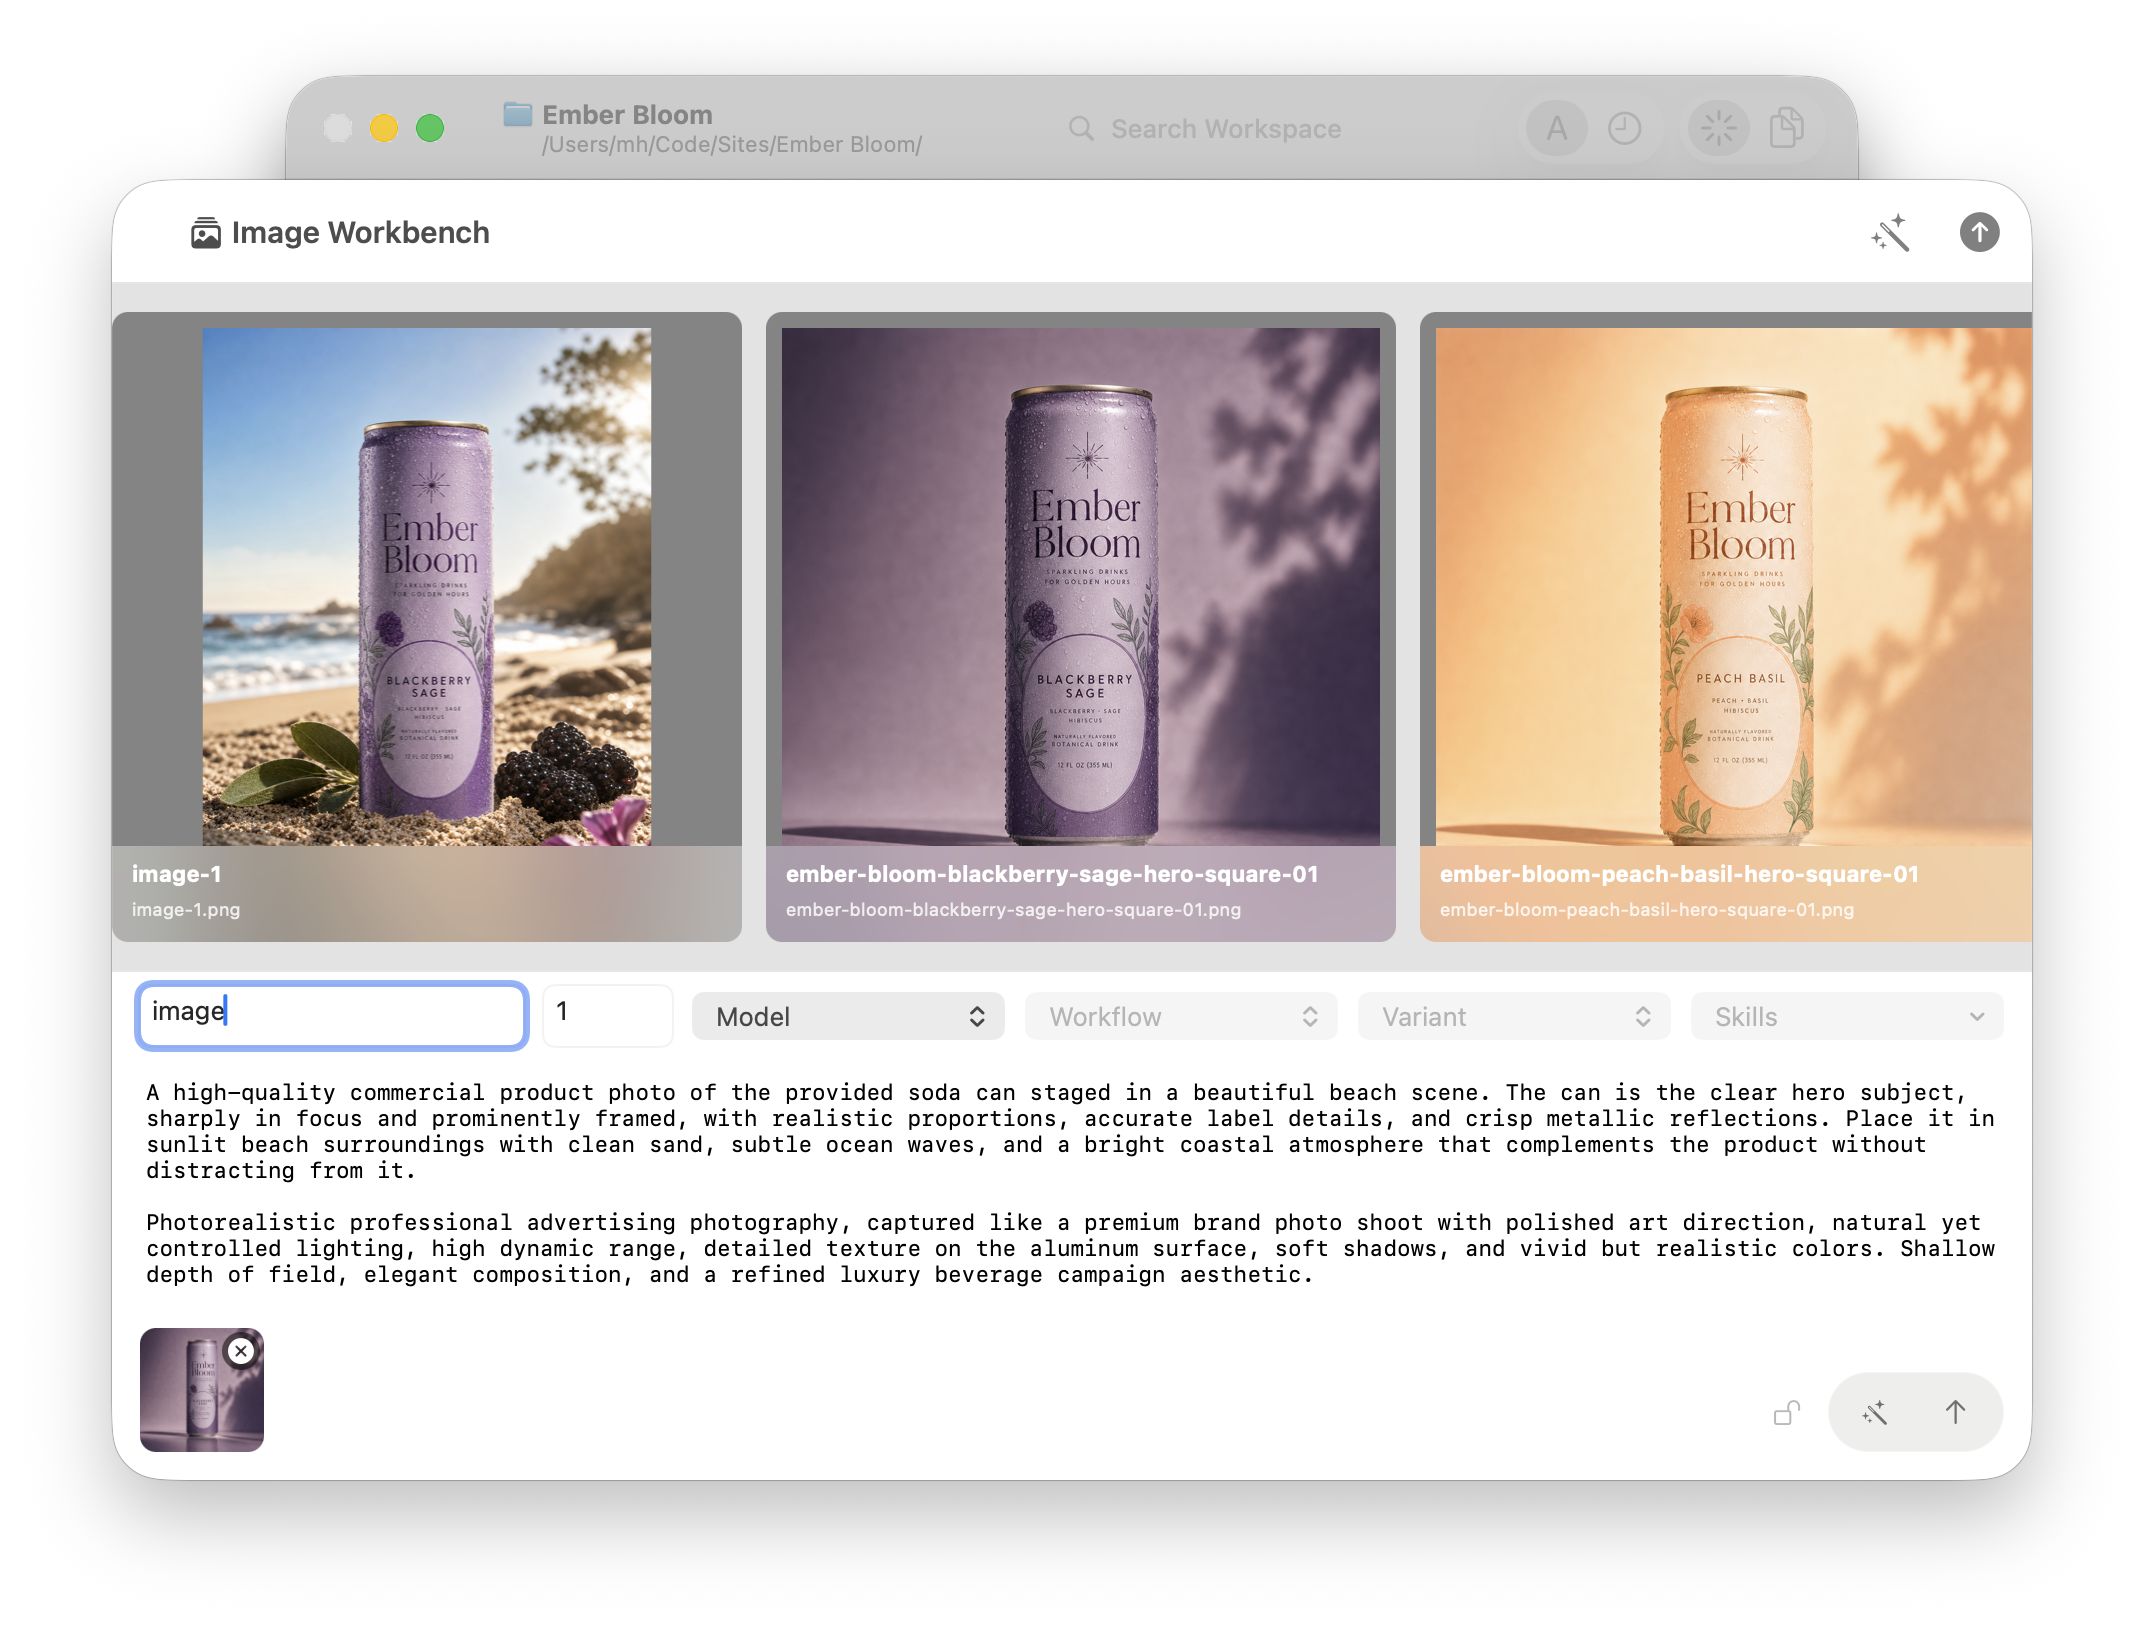
You can also leave explicit instructions for the refinement in the prompt, e.g. "image of this soda can in a beach scene. Make sure that the prompt specifies that this should look like a high-quality photo shoot." CodeBot will not only tune the wording for you, but also turn your instructions into actionable prompt details.
Reusing Prompts
The context menu of images in the Workbench (and the workspace file tree) gives you access to the metadata of the images. If you ever want to reuse (and maybe tweak) a prompt from a previously generated image, just right-click it and choose either Copy Prompt or Use Prompt, to have it either placed on the clipboard or, even easier, right in the prompt editor for you to adjust or reuse as-is.
The "Show Metadata" menu will show you more details, including, for example, what provider and model were used for the image:
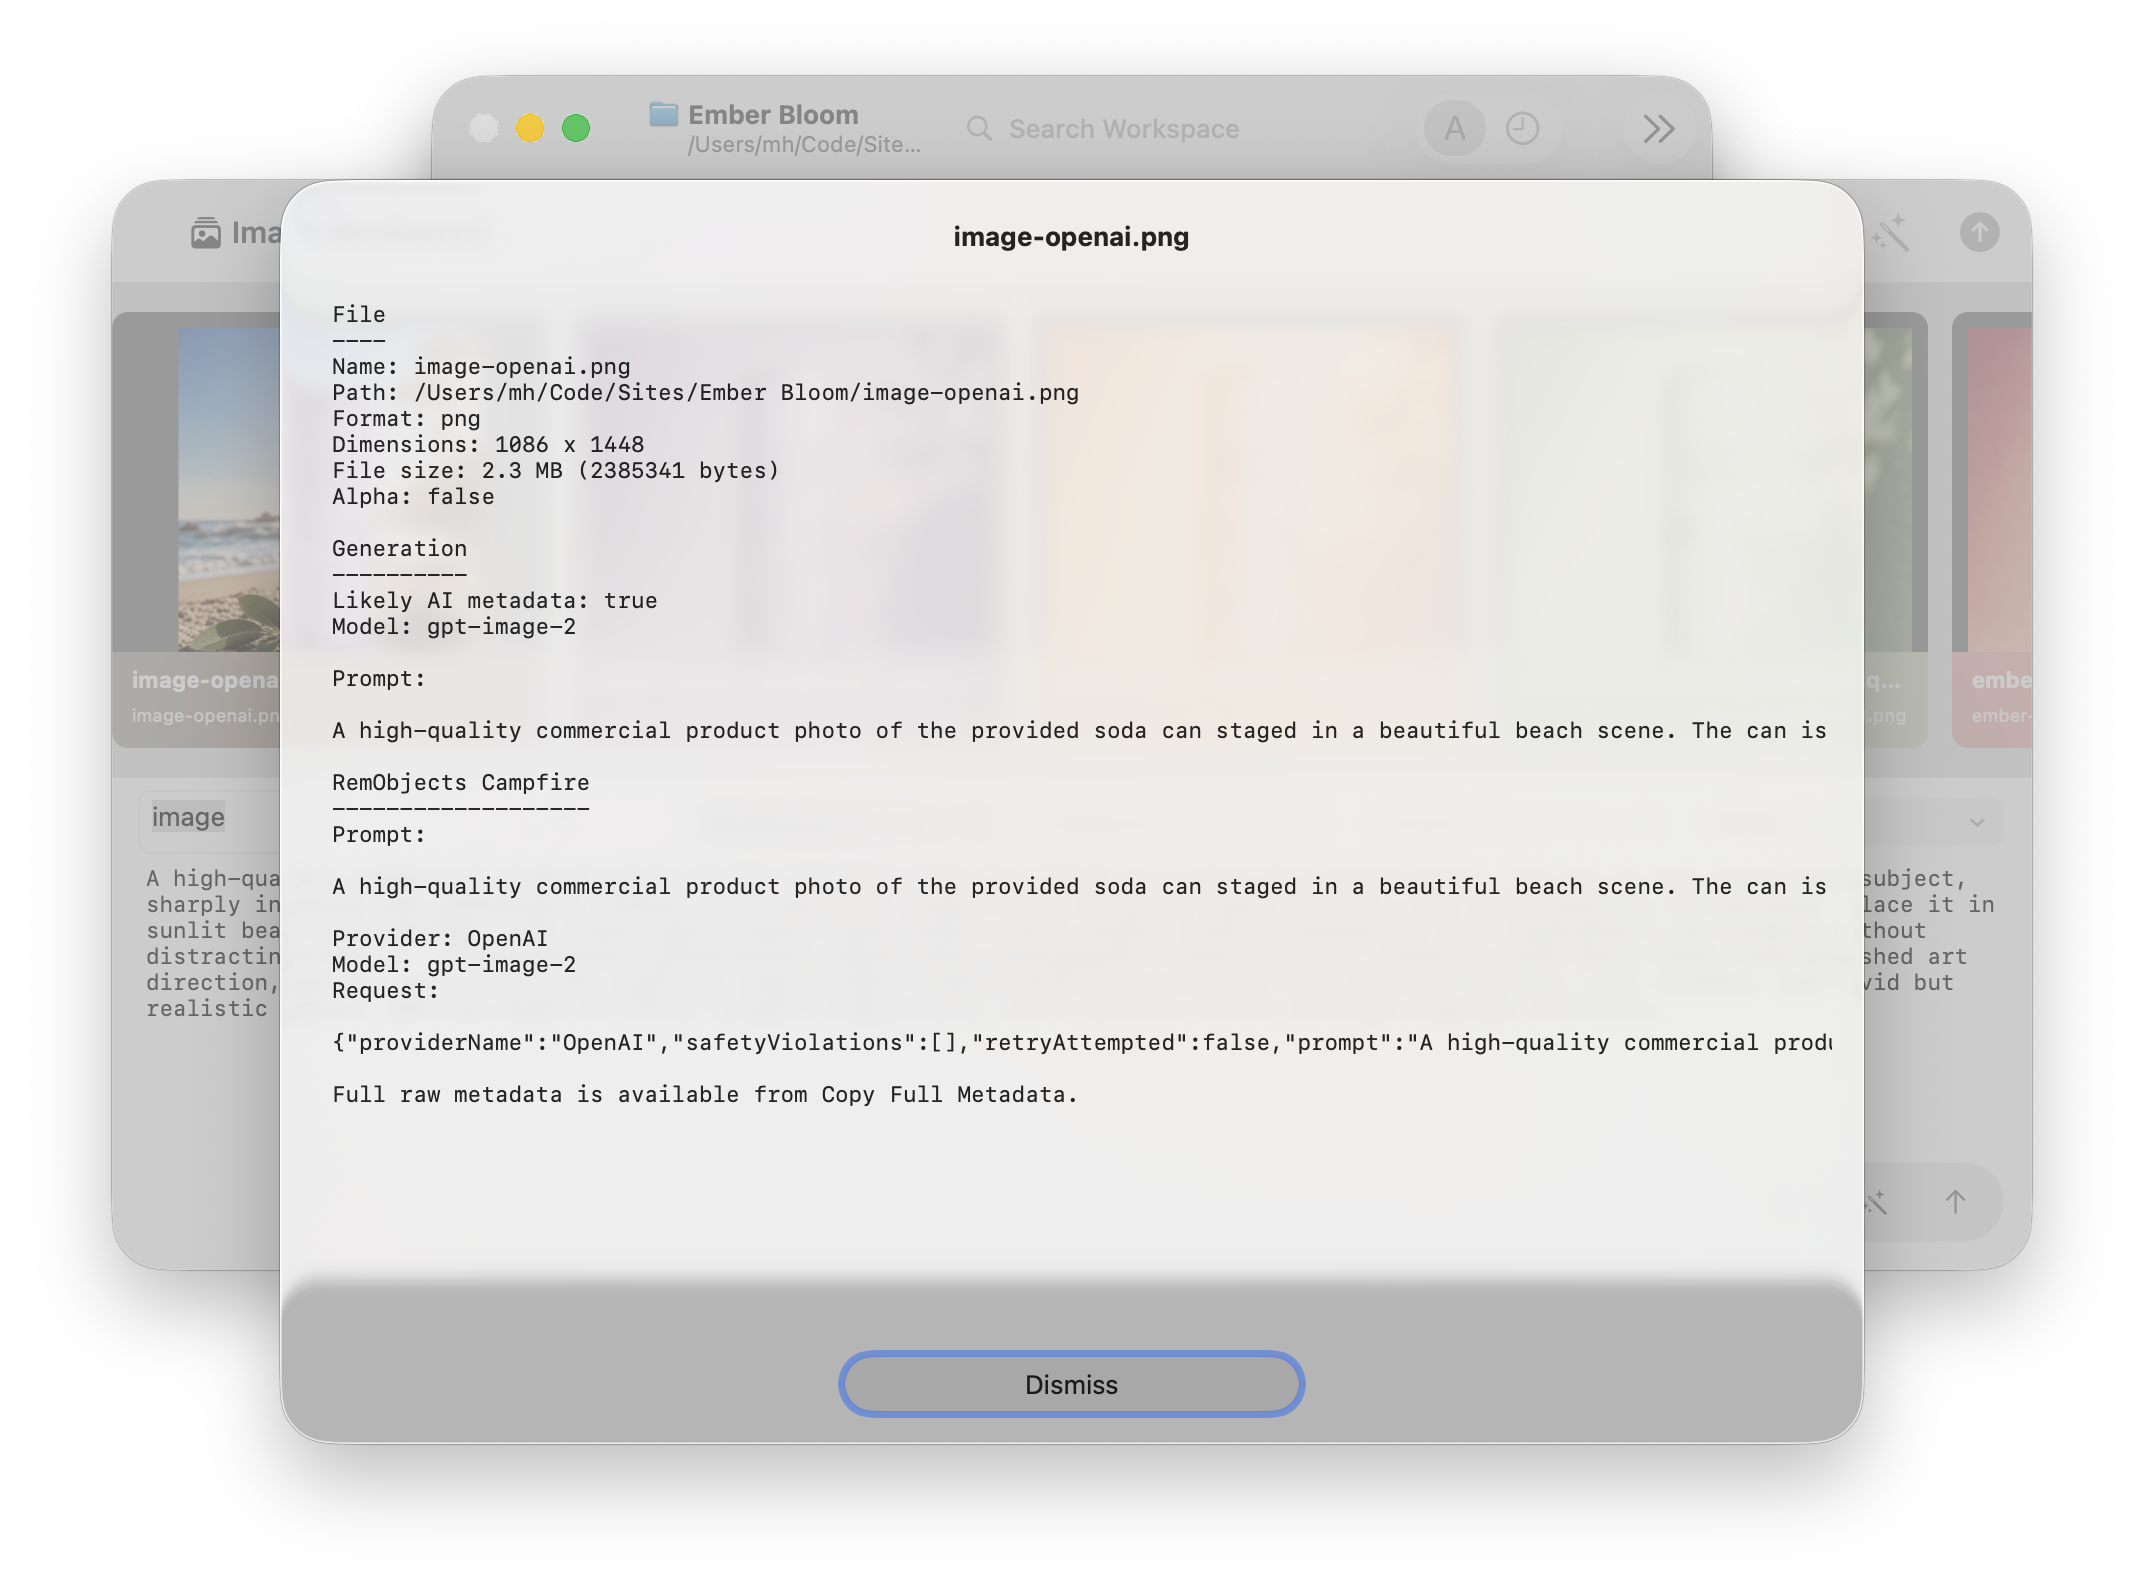
The context menu also gives you easy access to finding the file in Finder, copying its full file path, and more.
Reference-Driven Work
The workbench is useful when an image depends on existing source material. Keep references, selected results, and refinements in one place so CodeBot can reason about the visual direction and the files that matter.
Reference images can be used to guide composition, style, character identity, product appearance, or other visual details, depending on the selected provider or local workflow. Not every model supports references the same way, so check the generated result and iterate when needed.
In the examples above, the hero shot of the "blackberry sage" soda can was passed as a reference image to the beach prompt, to ensure consistency in the look of the can, to a level that cannot be achieved with words alone.
To add one or more reference images to a prompt, simply drag the image into the prompt field from the gallery above, from Finder, or from anywhere else in the system. The number of supported images may depend on the model.
In-Painting and Mask Creation
For targeted edits, use mask creation to mark the part of an image that should change. You can invoke "Create Mask" from the context menu of any image in the workbench (or in the Workspace file tree).
Choose a brush size and feather, and paint over the object, background area, or detail that needs another pass. A good in-painting mask will usually have some feathering (a soft edge) around the border, and cover the area you want replaced with ample margin.
The mask will act as a boundary, and the in-painting will only update areas covered by the mask.
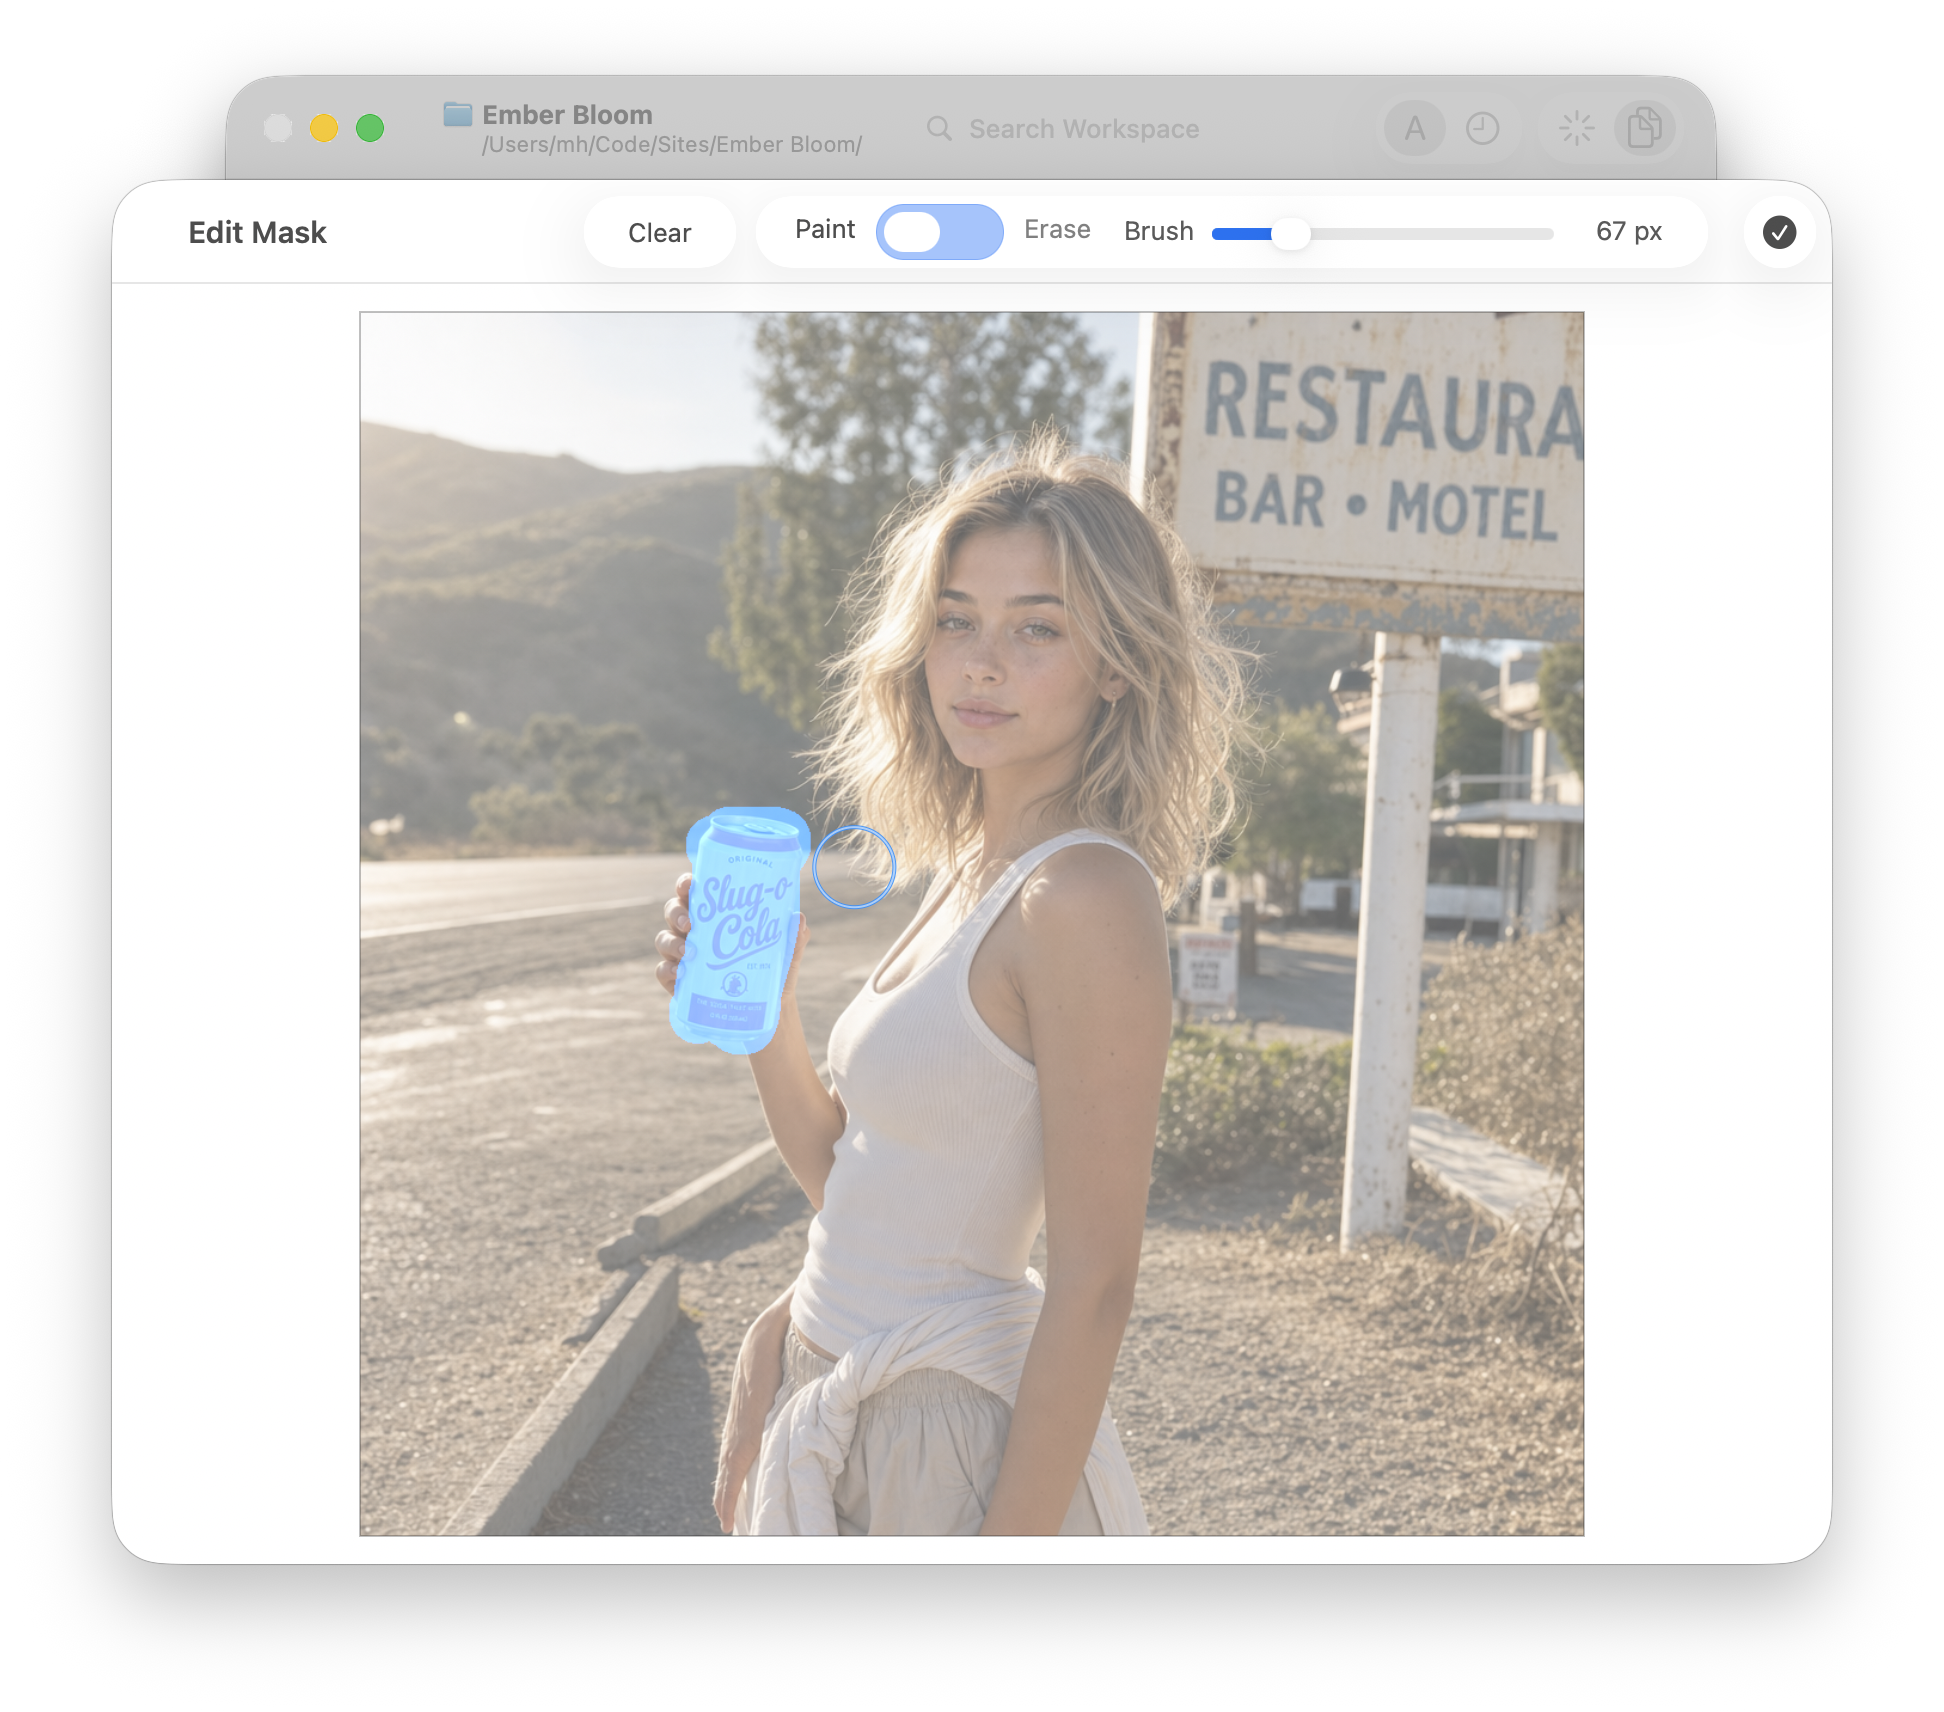
Once a mask is saved, it will show as a new, separate image in the workbench, saved next to the original and with a "-mask" name suffix. You can recognize mask images by the "theatre masks" overlay, and Workbench will draw the mask alongside its original image for easier recognition:
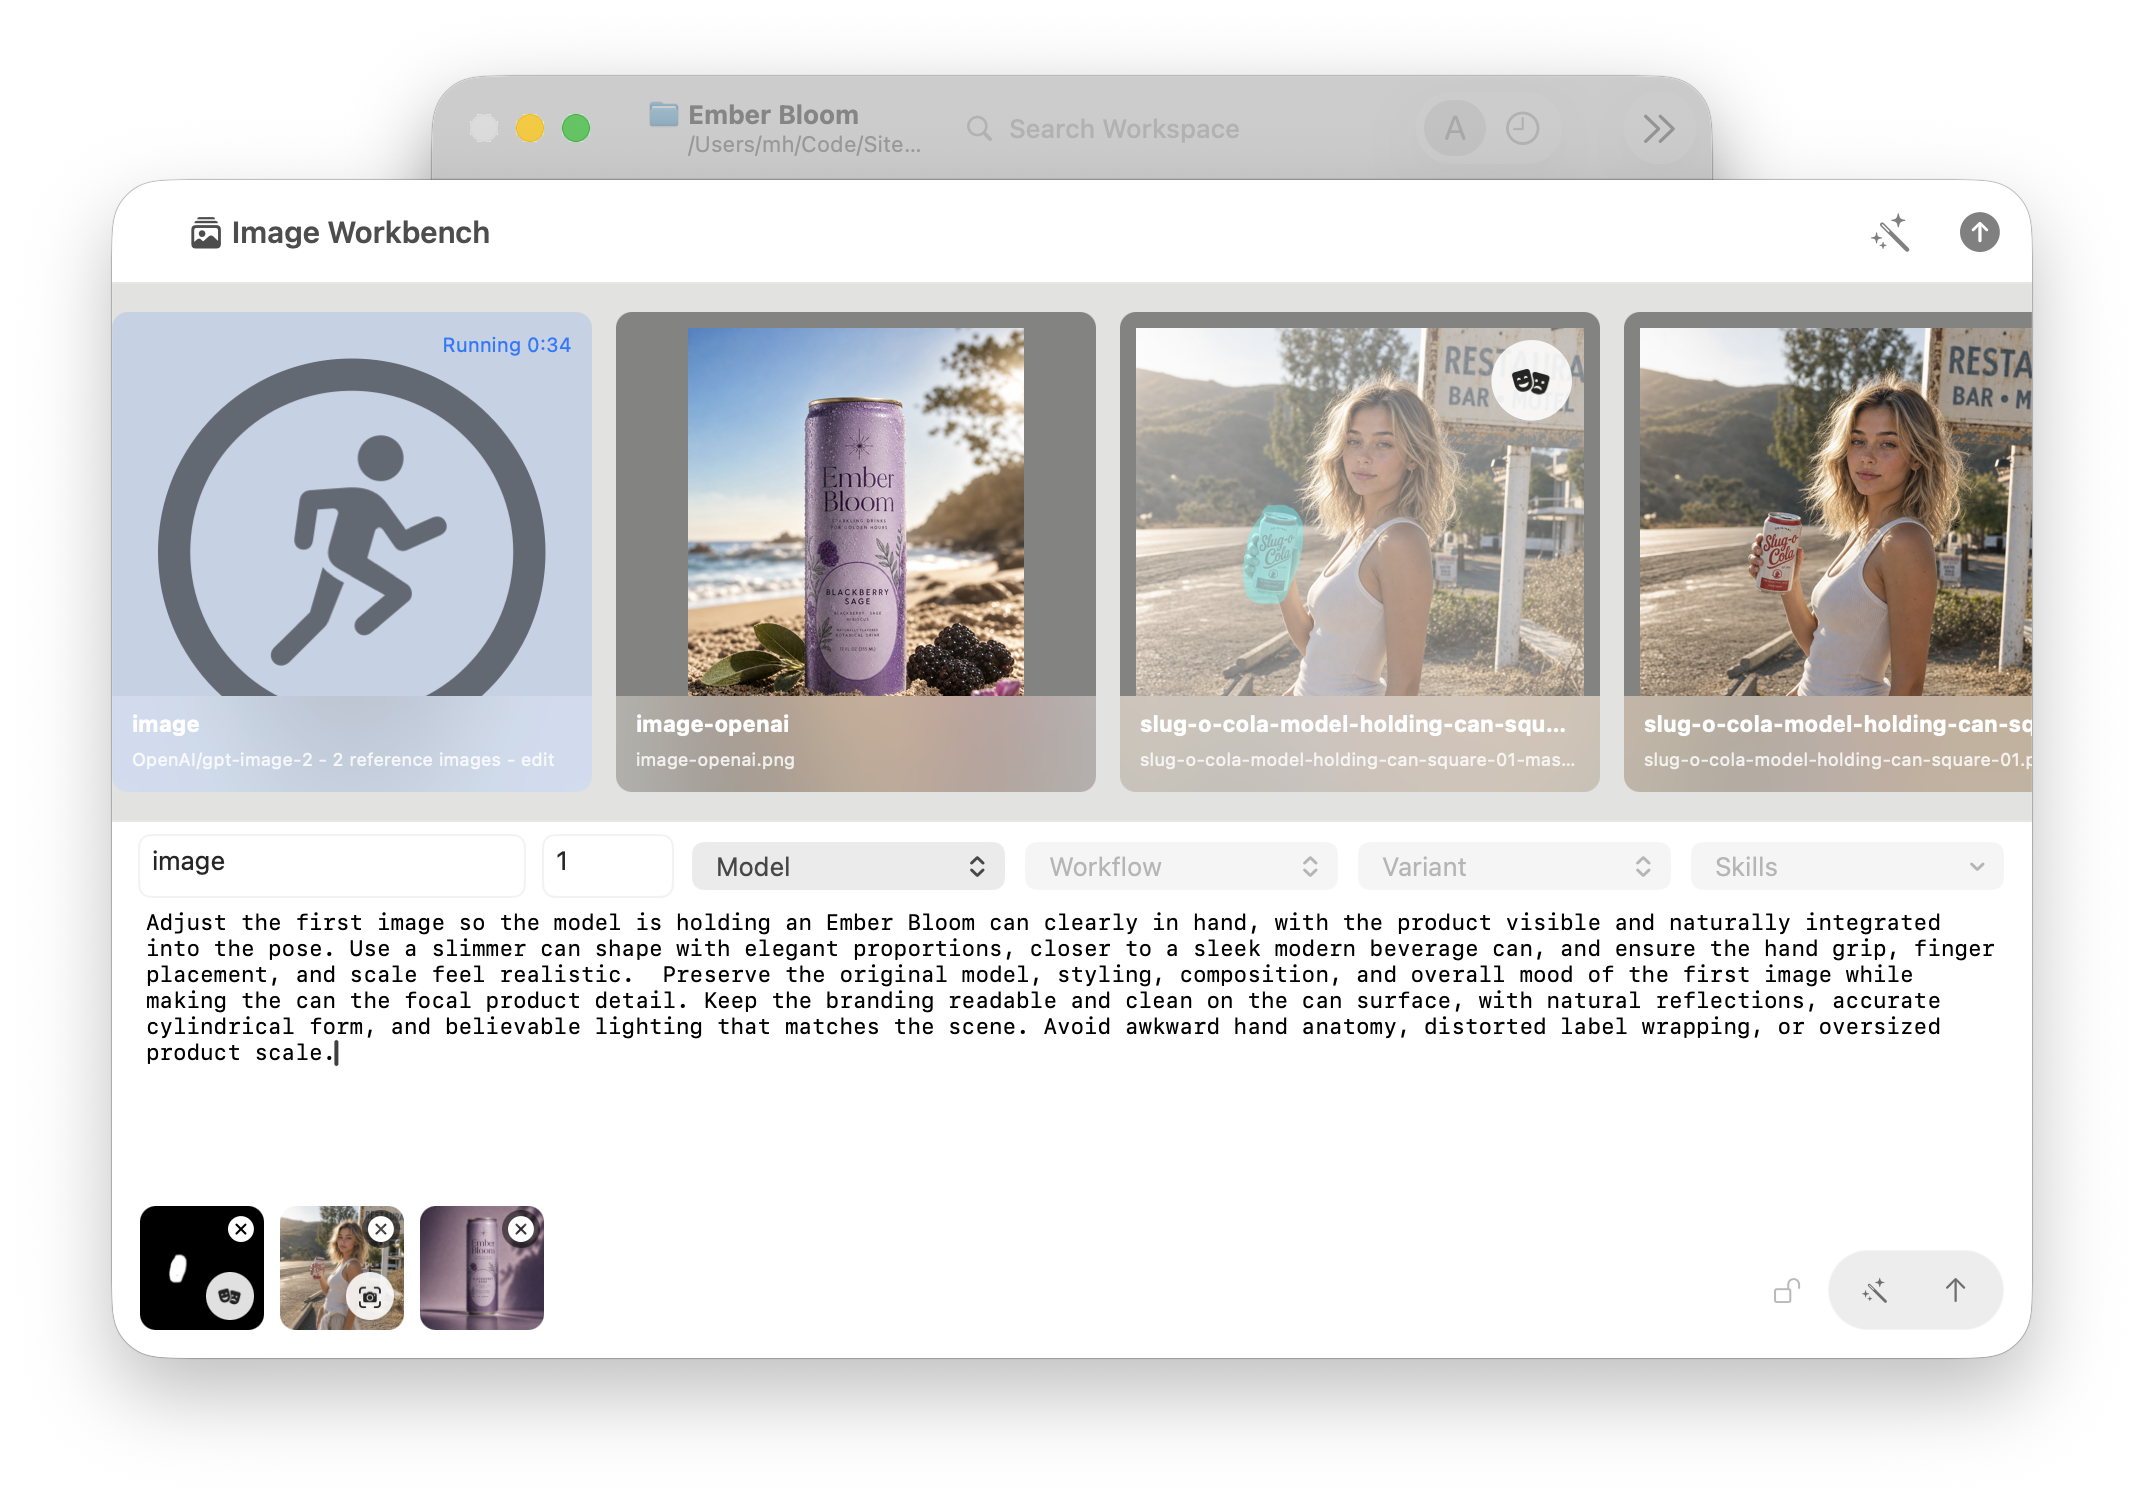
Dragging a mask image into the prompt text field will add both the mask and the original as source/mask images to the prompt.
In-painting uses the original image as context and replaces only the masked region. This is useful for product touch-ups, background cleanup, object swaps, repairs, and subtle corrections where the overall composition already works.
Good in-painting prompts describe the desired change and the surrounding context:
- "Replace the mug with a matte black travel cup, matching the same lighting."
- "Remove the logo from the wall and fill the area with clean painted plaster."
- "Repair the hand while preserving the pose and camera angle."
If the result is close but not quite right, refine the prompt, the mask, or both (you can choose "Edit Mask" from the context menu of the existing mask image, or create a new one, of course), instead of regenerating the whole image.
Note: Some models will respect masks 100%, while others will use them as suggestions or guidelines.
Model Overrides, Workflows, and More
The active model strategy in Campfire usually defines a default model to be used for image generation. For example, if you are using the "OpenAI Latest Models" strategy, images will (as of this writing) be generated by gpt-image-2. In addition to overriding this in global Settings and Workspace Settings, you can also pick a different model to use right here in the Image Workbench.
This is useful if you want to quickly try the same prompt against different image providers, such as OpenAI, Gemini, Grok, or Kling, or just to use different model levels, for example, grok-imagine-image to create a few drafts and the slower and more costly grok-imagine-image-quality for the final render.
For providers that support it (currently only local ComfyUI), a given model (e.g. comfyui-workflows) might expose support for picking specific workflows and workflow variants.
Setting up ComfyUI is an advanced topic. The ComfyUI page gives you some guidelines, but you should also refer to external ComfyUI resources for proper setup.
Skills
If you have media-generation-specific skills defined in your workspace, they will show up in the Skills popup on the right of the workbench. You can select one or more skills, and their contents will automatically become part of the final image prompt and be used for prompt refinement as well.
For example, you might define a skill that describes specific traits of your product that you want to have included in every generated shot, without having to remember or repeat them verbatim every time (e.g. "make sure the plumbus is always attached to the doohickey on the left side of the thingamaboo, never the right"). You might have a different skill, or set of skills, that defines a fixed set of photographic styles to always apply (e.g. "Nikon D500 look, 30mm, shallow depth of field, beautiful hexagonal bokeh").
See Also
- Image and video slash commands
- ComfyUI workflows and variants
- Image analysis and image utilities